Due to the disadvantage of RPN, many companies prefer to use a customized risk matrix than only using RPN for risk evaluation. This instruction will show you how to set up to prioritize the risk with a risk matrix.
Note: FMEA Studio 2022 supports both two or three elements of the risk matrix.
1. Parse the risk matrix into a table
To make FMEA Studio understand your risk matrix, we need to parse it and convert it into a condition table. Below is here how to do it with an example of 2 elements matrix:
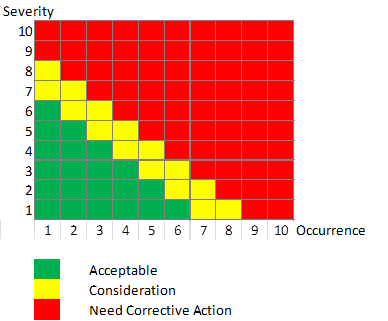
- There are two elements in the following risk matrix: Severity and Occurrence. And the risk priority level takes the value of Acceptance (Green), Consideration (Yellow), or Need Corrective Action (Red), depending on the combination of each Severity and Occurrence value.

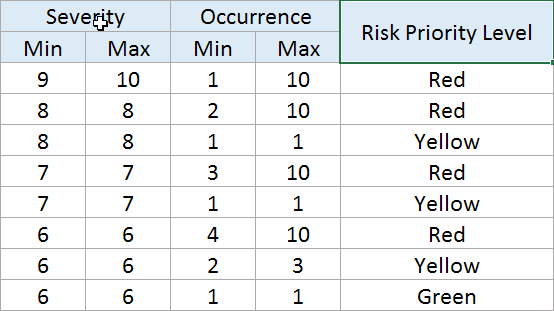
- For each combination of 2 elements, Severity and Occurrence, we translated it to conditions of the matrix table as below. For example, with Severity from 9 to 10 and Occurrence from 1 to 10, the Risk Priority Level is Acceptable (Red). Repeat this action for all combinations of the matrix. We will have a condition table below.

Note: 3 elements risk matrix is similar to the two elements risk matrix.
After getting the condition table, we will show you how to set up a risk matrix column in the following section.
2. Set up a column for the risk matrix
If your template already has a column for the risk matrix, you can ignore this section and go directly to the next section. If not, follow the step by step below:
- Insert a new column.
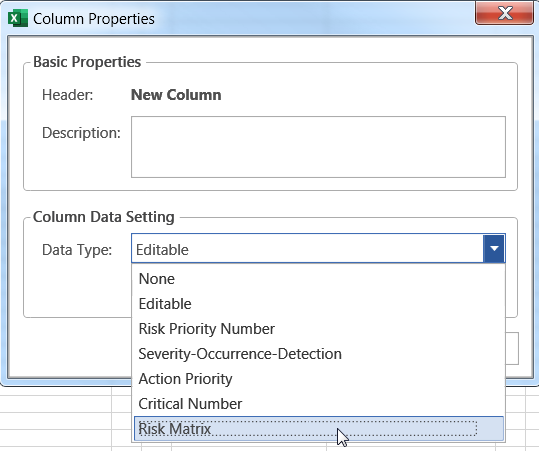
- Righ-click on the new column header, then select Column Properties.

- Under Column Data Type setting, select Risk Matrix from the Data Type combo box. (The default data type of a new column is Editable)

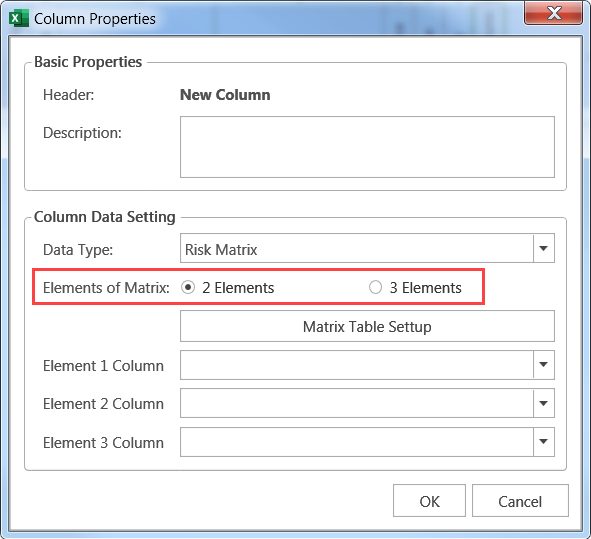
- Under Elements of Matrix, select 2 Elements or 3 Elements depending on the number of elements of the risk matrix you need to build.

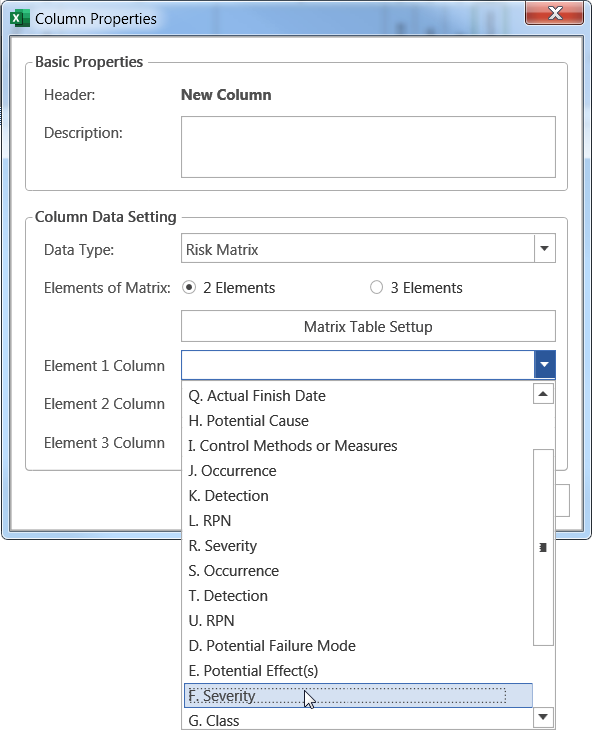
- Select responding columns in the Element 1 Column, Element 2 Column, and Element 3 Column Combobox. These columns should hold the element value of the matrix. Example: In the following picture, with the “F. Severity” column, F is the Excel column address, and Severity is the label of the header of the selected column.

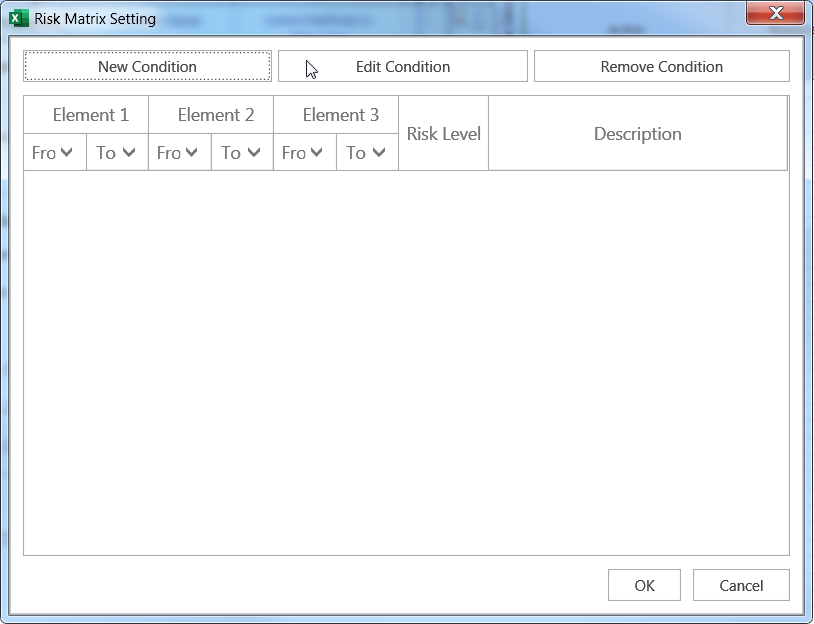
- Click on Matrix Table Setup to build the condition of the matrix.

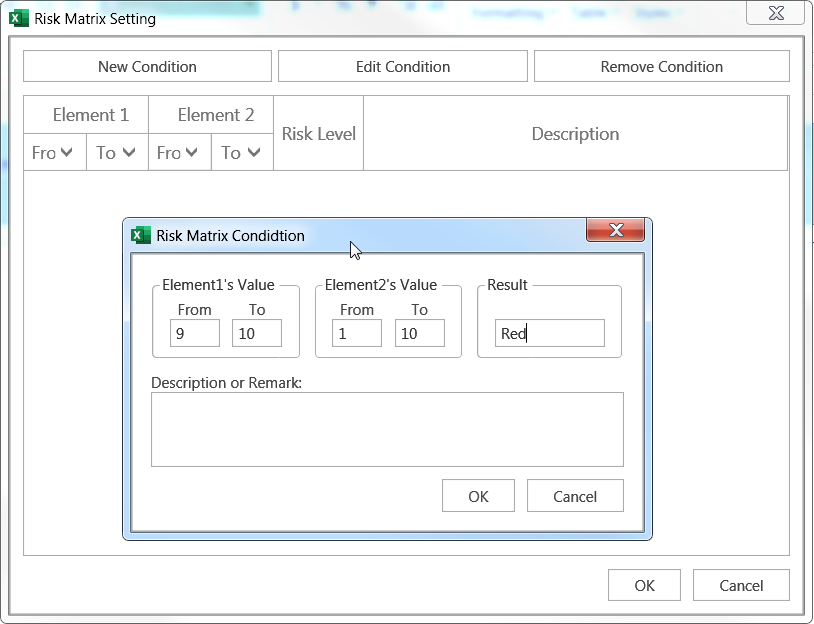
- Click on New Condition to start creating conditions for the risk matrix condition table. The first condition of the condition table above has been made in the following image.
- Repeat the above step until covering all conditions of the risk matrix.
- Click OK to save and close the Risk Matrix Setting dialog box.
- In Column Properties, Click OK to save and close the column setting.