Each company and team uses different symbols for their Process Flow Diagram or Process Flow Chart. For example, you may use a rectangle for a fabrication process, but your customer may want to use a circle or a triangle. FMEA Studio add-in allows a custom symbol list by using Process Flow Diagram Options

The following sections will describe how to use Process Flow Diagram Options to customize the process step symbol
1. Open Process Flow Diagram Options
To open the Process Flow Diagram Options dialog box, on the FMEA Studio tab (Excel’s ribbon), in the PFD group, click PFD Setting.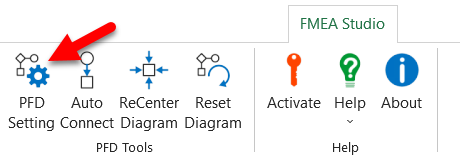
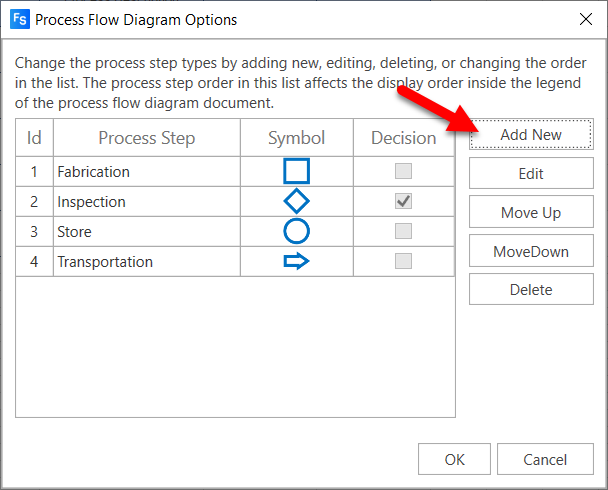
2. Add a new process step type
You may want to add a new process step symbol for your PFD. Here is how to do it:
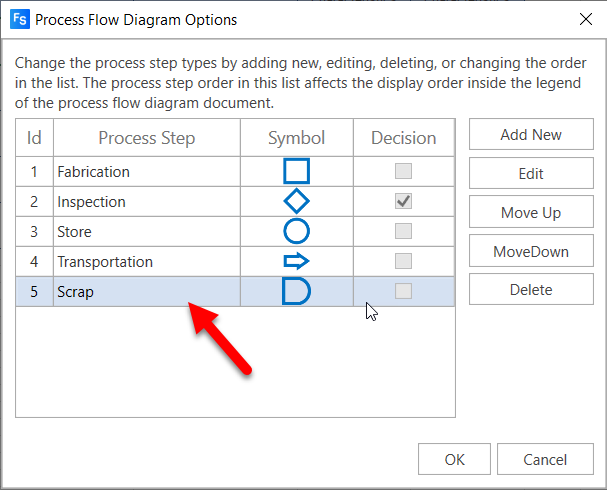
- Click Add New in the Process Flow Diagram Options

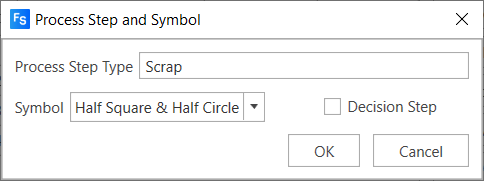
- In the Process Step and Symbol dialog box, in the Process Step Type box, input the name you want for the new process step type.

- In the Symbol box, click on the black triangle to display the drop-down menu, then select the symbol type you need for the new process step type.
- Select the Decision Step checkbox to use it as a decision step. The decision step has two connectors that go out from it: one is the OK connector, and the other one is the Not-OK connector. The non-decision step has only one OK connector.
- Click OK to save the new process step type in the list.
3. Edit process step type
You may want to edit an existing process step type in the list. Here is how to do it:
- In the Process Flow Diagram Options, in the list of process step types, double click on the process step type you want to edit (or select it in the list, then click Edit).

- In the Process Step and Symbol dialog box, change the name, symbol or decision characteristic of the process step type.
- Click OK to save the change of process step type.
4. Delete a process step type
You may want to delete an unused process step type in the list. Here is how to do it:
- In the Process Flow Diagram Options, select the process step type you want to delete in the list of process step types.
- Click the Delete button on the right of the dialog box.
5. Change the position of a process step type in the list
The position of a process step type in the list in the Process Flow Diagram Options affects the display order inside the symbol legend of the PFD document.
If you want to change the position of the process step type displayed in the legend, you need to change its position in the list of process step types inside Process Flow Diagram Options. Here is how to do it:
- Select the process step you want to move in the list of process steps
- Click Move Up or Move Down, depending on the new position you want it to be

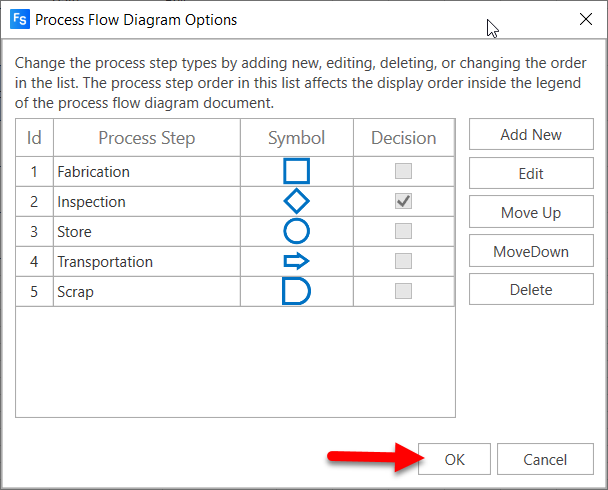
6. Save the Process Flow Diagram Options
After changing the settings inside the Process Flow Diagram Options dialog box, you must save changes if you want them to take effect.
- Click OK to save and apply the change
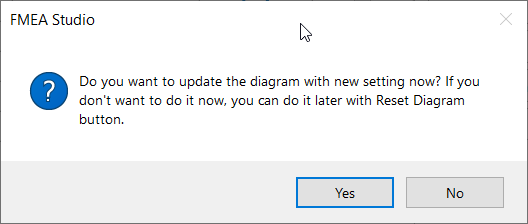
- A message appears to ask if you want to apply the change on the worksheet. Click Yes if you want to update the diagram with the new settings you just made. Click No if you don’t want to apply it. You can manually update the diagram with the new settings with the Reset Diagram button in the FMEA Studio tab.